Win10 1909系统自带清理缓存的使用步骤
电脑使用时间久了都会自动产生很多缓存,如果没有及时清理的话就会影响电脑的正常运行速度,有很多用户升级到win10 1909系统之后却不知道要怎么清理缓存,其实它本身就自带有清理缓存功能,那么要怎么使用呢?现在给大家带来Win10 1909系统自带清理缓存的使用步骤。
具体解决方法如下:
1、我们点击桌面左下角的开始菜单,点击设置按钮。

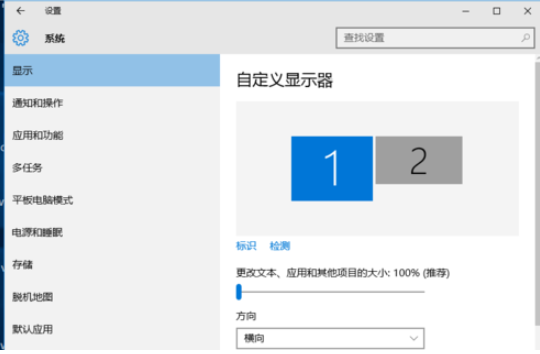
2、我们进入到设置页面中,然后点击系统按钮。

3、进入到系统页面中,我们先点击存储选项,再点击右侧的c盘选项。

4、我们进入到c盘页面中,点开临时文件选项。

5、然后点击删除文件的选项即可。

上述便是Win10 1909系统自带清理缓存的使用步骤,小伙伴们可以学习上面的方法来清理缓存吧。
我告诉你msdn版权声明:以上内容作者已申请原创保护,未经允许不得转载,侵权必究!授权事宜、对本内容有异议或投诉,敬请联系网站管理员,我们将尽快回复您,谢谢合作!